The parties usually have a theme. His first birthday was a Yo Gabba Gabba motif and the whole family was invited. I'm lucky to have a super talented sister who constructed this 4 foot tall Plex Robot to greet guests. Here he is in her garage before the party:
 |
| Looks like Plex is just hangin' out and havin' a Coke! |

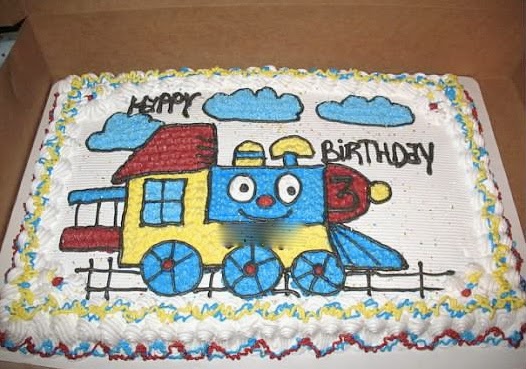
And of course the cake had to match...

Year 3 was a Train theme, and we were so grateful that our friend Jelene let us use her adorable train graphic as the centerpiece of the party!
Year 4 was an Angry Birds theme party at a local bounce house place. It was the first time I noticed The Jersey Momma's Boy had a bit of party anxiety. He still gets a little anxious at public parties, but we're working on it.
Angry Birds goodie bags and cupcakes were the highlight of the party! The cupcake toppers were actually plastic rings that the kids could wear! For more on how to dye cupcakes in bright colors, check out my entry on rainbow cupcakes from March.
Angry Birds goodie bags and cupcakes were the highlight of the party! The cupcake toppers were actually plastic rings that the kids could wear! For more on how to dye cupcakes in bright colors, check out my entry on rainbow cupcakes from March.

And then year 5 arrived, and the Jersey Momma's Boy asked if he could have his party at home, old school style. He really, really wanted an Art themed party. And that's where this entry finally begins!
The party was for 4-5 year olds with a couple of younger siblings thrown in the mix, so I had to come up with simple, quick projects that would keep everyone occupied. The teacher in me went into organizing mode, so I created four centers (let's call them "stations" so we don't feel like we're in school) and figured I would divide the kids up into groups of 4 as they arrived. The early birds could start at the coloring station so that they'd have something to do as others filtered in:

Each station was decorated with bright colors and set up in advance with all of the necessary supplies.

The first station was a bag decorating station (using stickers and construction paper crayons) so they would have somewhere to put all of their creations as they finished them:

The next station was a "Sand Art" creation. It's not really sand. I made each color using salt and chalk, which is much cheaper. For more on how to make your own "Sand" Art, check out this entry: DIY Sand Art

Our next station was for Home-made Spin Art. This is soooo easy and you can find out how to do it by reading this entry: DIY Spin Art
 |
| Quality photography, right? But you get the idea. |
The last station was a little rainbow craft using paper plates, markers and cotton balls. You can read more about how to make that here.

Oh, and don't forget those little siblings I mentioned! I had a few guests coming that were under the age of 4, and I knew they might not be able to do all of the art projects or stay focused on them. So I set up a sensory table near the sofas, filled with rainbow rice. Believe it or not, this actually occupied them for most of the party! You can read about how to make Rainbow Rice here: How to Make Rainbow Rice

Goodie Bags
You have two options for goodie bags (well, you have as many options as you want but I chose from two options!). My first thought was to have an Art Supply Bar, and fill bowls with different art supplies: markers, crayons, erasers, pencils, play dough, etc. But the Jersey Grandmomma argued that kids this age would not know to take one of each item and that they might fight over colors. So I wound up just putting a handful of art supplies in little clear bags and tying it off with a ribbon. This was relatively inexpensive, since you could split up one package of markers and crayons to get the supplies you wanted for each goodie bag.

- I had "extra" time fillers planned since I knew the projects probably wouldn't take two hours. So we also played COLOR BINGO, danced to some favorite hands-on tunes, and took turns hitting a rainbow colored star pinata (you could also play simon says or something simple to fill time)
- We just had cupcakes for dessert and pizza as our main meal. The cupcakes had rainbow sprinkles to keep the theme going
- I had a station of extra supplies, scissors and glue handy in case I needed anything at the last minute
- Be sure to label each child's project with their name before they start making it in case they leave it behind, or in case they need to come back and get it after it dries.
- For the Spin Art, I ran and put each painted piece outside so it would be dry in time for them to take home
- If you can get friends to help you, it helps to have someone "man" each station. It helps to have an adult in charge at each station to help with craft creation!


Very creative! Well done!
ReplyDelete